Sunday, December 7, 2008

Another Dream Realized: 11-08 THE STUDIO- Part 1: BEFORE CONSTRUCTION


After four months of long, hard planning, research, and labor, the music rehearsal studio is finished. Debbie and I bought this home because it had all the qualities we had searched for 5 years to find. One of those was a space where we could write and rehearse music, hopefully without disturbing neighbors. Our home on Brices Creek came with an outbuilding that has two adjoining rooms -each approximately 12 feet by 20 feet-with a door and large, long window connecting them. Long ago, 1950's? -the middle room used to be a hair salon, as evidenced by a nice, professionally constructed wood sign I found up in the building's attic- Marietta's Hair Salon. I knew I could later convert this storage space into our little studio, and four or five months ago I set out to do just that. I'm no contractor, not even a carpenter. So this was not an easy job for me. Up until now, the hardest construction work I'd ever done wa demolition of a two story log house that had a two story frame addition attached to it. I worked hard preserving and numbering those logs, carefully removing all the house's windows and boards, so they could be recycled. And I've done a lot of remodeling and smaller construction project over the years. But the studio was the longest and hardest physical work I have ever done. I lost ten pounds and regained a lot of strength in my arms, back, and shoulders. But now it's done! And this week I wrote my first song in over a year and a half while sitting at my old teaching podium by the window there, lookin out at beautiful Brices Creek. Looks like all that searching, planning, expense, and work paid off.
ALL THESE PHOTOS CAN BE ENLARGED BY CLICKING
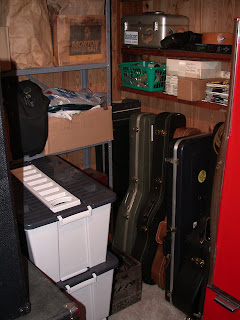
Above are a couple photos of what I had to start with- a shed had been attached to the middle (salon) room. Note the small door cut into the back wall to allow goats or calves to bed down there. The cedar post near the right corner was the support for the shed roof, later extended a couple feet more when a newer roof was added, and the whole room enclosed in (sub)standard framing, with a very small garage door added to one end of the room. Then they poured a concrete floor and cut some of the cedar posts after pouring the slab. (I wore out a drill by grinding down one of those old posts!) I guess previous owners stored small fishing boats in there, as parking a car in that tight of a space would be impossible. I had the two garage doors removed and two sliding glass doors put in their place. A rushed decision, it turned out to be my first mistake. Too much noise escapes in and out of this room because of the inexpensive (300$) vinyl sliding glass doors (SGD). Wish I could have afforded at least one, good, "soundproof " SGD instead of what I had installed in the studio. The other SGD is for the shop room, and as such works fine there, allowing lots of light.
Update: more views of the completed studio can be seen at my band's website here:
NOTE: THERE ARE LOTS MORE POSTS AND PHOTOS REGARDING HOW I BUILT MY STUDIO. JUST CLICK "OLDER POSTS" BELOW.


THE STUDIO: Part Two-A: DURING CONSTRUCTION


I had to close up the wall as tightly as possible that seperates this room from my neighbor. Since there were so many gaps between the old barn boards, I filled them with "Great Stuff" foam. This shot clearly shows the cedar post that used to hold up the shed roof. I used a chainsaw to flatten the inside of the post so I could nail to it later.

THE STUDIO: Part Two-B: DURING CONSTRUCTION


There was a considerable 20 foot long gap between the "shed" roof and the older main room's roof that I filled by adding plywood, and then backing it with foam and a layer of batt fiberglass insulation. This had to be done slowly in 2 foot increments because I had to reach behind each section of plywood in order to push the foam and then the fiberglass against the plywood. Note the corregated steel at the bottom of the photo? The entire middle room is covered with the stuff. Made for challenging methods of nailing and screwing to it.

THE STUDIO: Part Two-C: DURING CONSTRUCTION


Here is the installation of some different insulations used in the room. Additionally, I blew around 20 inches of fluffy insulation into the attic of the middle room, using a Lowe's rental unit. Also, note the putty formed around each electric fixture in both rooms. This product is supposed to be
for fire prevention and to stop sound from entering/escaping to room. Also not shown is the radient barrier (foam and foil insulation) I first added to the rehearsal room's walls and ceiling. I highly recommend a radient barrier for EVERY room construction job, new or rehab! I could immediately tell a difference in the room's temperature swings just with the addition of radient barrier.
All in all, the walls now have seven layers on them: (from outside going in) Vinyl siding, plywood sheathing, radient barrier, foam or fiberglass, mass loaded vinyl, and 3/4 inch sheetrock. Wish I had added another layer of sheetrock with "GreenGlue" between sheets to absorb more sound vibrations. Adding weight (mass) is the cheapest way to soundproof, and sheetrock is not expensive, just labor intensive.

THE STUDIO: Part Two-D: DURING CONSTRUCTION


It cost $1000 to buy mass loaded vinyl for the rehearsal room, but I bit the bullet and did it. Loads of web research showed that a newer product that actually has the heavy vinyl layer sandwiched between two thin sheets of sheetrock was probably the best choice, but getting it from Raleigh to here proved to be too expensive. Another choice was Green Glue that you apply between layers of sheetrock. This too is a fine choice, I think. And the extra layer(s) of sheetrock will stop bass sounds better than what I have. But I opted for mass loaded vinyl (MLV), the time proven sound reduction product that was invented 50 years ago to replace lead sheeting used to soundproof radio and sound studios for many years. At one pound per square foot, MLV is heavy. My son, Michael John, and Debbie had to help me hang it from the ceiling, probably the single hardest part of the construction. RENT A NAILGUN IF YOU EVER HAVE TO DO THIS! The chalk picture of the goat on the MLV is mine, I admit. It's here just to remind me that I started with a glorified goat barn.

THE STUDIO: Part Two-E: DURING CONSTRUCTION


Next, after the MLV was up, was sheetrocking the entire room. For this I used the thick-3/4inch- rock on all the walls, and the easier to hang 5/8inch rock on the ceiling. Had to hire a fella to help me hang the ceiling, but it was worth it. Debbie utilized her amazing spacial skills in helping me measure and hang pieces of sheetrock. Notice the "boss" is busy supervising!

THE STUDIO: Part Two-F: DURING CONSTRUCTION


The next step, of course, is to finish the sheetrock. Fortunately, this is the one area of construction where I have had some training and experience. My career as a sheetrock finisher only lasted a couple months, back around 1972, until my boss tried to "sell me" his girlfriend for the night. That's the day I quit.
Once finishing work was done, I painted the whole room.
Deb and I attempted a form of "knock-down" ceiling texture to hide defects there. I mudded in the ceiling, Deb followed along behind making circular patterns with a long handled stippling brush, and after curing a few minutes I followed her with a wide blade mud knife, knocking down her patterns. It made for a thickly textured ceiling that pretty much hides any flaws, but the MLV's weight on the thinner sheetrock used in the ceiling caused a "pillowing" effect. (Notice the "bulges" in the ceiling?)
I added two ceiling fans with light kits to keep hard working musicians cool. Notice they have short blades? That's because the ceiling is slanted- and I could hang them up higher, and because guitarists tend to lift their guitar's necks up in the air when taking the guitar with strap on or off. Maybe they won't get hit!
I custom cut the floorboard trim pieces and finished them. Because of the waviness in the walls I had some big gaps between the trim and the wall. This was cured by stuffing fiberglass batt in the gaps and covering with caulk, then smoothing the caulk and touching up the walls a little.


THE STUDIO: Part Two-G: DURING CONSTRUCTION


NEXT CAME THE MIDDLE- OR (OUT OF) CONTROL ROOM

The middle -or control- room also came with its own 8 foot long window that connected it to the adjacent shop. Back in the day the room was a hair salon, the propriator would open the two long windows- one on each side of the little business- by raising hinged shutters on each window. This allowed cooling breezes to flow through. I filled the middle room's window with paneling and caulk, then foam board faced with foil/aluminum. But that still left a 4-5 inch cavity to fill. So I built sound traps/ bass traps out of plywood, thick carpet foam scraps, very thick foam rubber found in a roll, and fiberglass on the edges to give it form, all covered with a bright red fabric I also found in the attic. I liked the color so much I painted the door and room's refrigerator the same color! After finishing the two sound attenuators, I had another long piece of plywood, some standard foam, and fabric left over. So I built a large sound attenuator and hung it over the "bar" area. (I soon moved it to behind the drums.)
I added a small air conditioner (with a pretty noisy and useless ability to serve as a heater) to where a small window once had been. I had a friend come over and help me install three electric outlets. I had already hired an electric company to safely install five wall outlets, a motion sensing outside light, a GFI outside outlet, two fan/light ceiling boxes, and a circuit box to the rehearsal room ($500).
Also added to the middle room were carpet and a good, thick pad for the uneven concrete floor. I also installed ceiling tiles.
Then I added two sets of track lights to the ceiling.
I realized I needed a better source of heat, so I got a flat panel heater that could go on the wall and installed it. It works great! I put a piece of sheet metal between it and the wall because that tongue and groove paneling is probably 60 years old, dry and quite flammable.

THE STUDIO: Part Two-H: DURING CONSTRUCTION


WINDOWS
In the top photo you can see the new vinyl floor I added. People keep entering the room and saying, "Is that real tile...?" as they bend to touch it. Nice (Armstrong) stuff that has a cushion built in and won't curl up at the edges. I drilled a 3 inch hole through the wall under the window in case I ever want to run microphone lines, etc. in to the middle room, thus using it as a control room during recording. Added an oak threshhold to the sliding glass door area.
INSIDE WINDOW
Remember, there is a window seperating these two rooms. I could of left it open or closed the space with glass, one or two layers. I chose plexiglass/acrylic for three reasons: it was safer than glass at that height (2 1/2 feet above the floor,) it was cheaper (by now I was chewing right through our budget,) and I could slide it open if I ordered two smaller (4 foot) pieces instead of one (8 foot) piece. Herein I made another mistake.
But I don't have a lot invested, just the panels, their handles, some white quarter-round trim pieces, and some sweat.
Acrylic panels scratch easily, like when you clean them or open them by sliding them past each other, etc. They typically last 8 to 10 years. And they don't stop much sound. Not nearly as much as a thermopane glass window. And, to make them even LESS tight, I made these as a split window to allow heat and A/C to travel to the adjacent room. Lots of sound sneaks around the edges of this window area. But I can always replace these later with glass, and caulk it tightly. I also angled them slightly, immitating a "studio" look. (Probably an affectation I could skip when replacing them.) I'll factor in my decision whether heat and A/C lessens when I close the window. If it does, I may stick with the split design, only I'll go with a factory made unit that stops sound well.
As long as I had to frame in parts of this interrior window, I added a long, narrow "bar" out of a spare 2"X12" board I had. To this was added another couple inches of trim on the inside that makes this little "bar" 14 inches wide and usable. A few coats of stain and polyethelene and no drink circles!
OUTSIDE WINDOW
The outside window was another thing entirely. It sits the same length as the others (8 feet,) but it is higher. I had just read of a bass player putting the headstock of his bass right through a "soundproof" recording studio's window. So here I went with shatterproof plate glass. Again, economics drove the decision. Since there was already a nice, antique, beveled plate glass in place, probably part of an old (1920's) folding door, I added another layer of plate glass. I had to build the frame for it; the cheapest way was with 2X4's with lots of angle bracing. I lined the inside edges with good closed cell foam, and slowly placed the shatterproof glass in the frame. It has 12 brass screws to old it in place and brass handles to pull it out if it ever needs cleaning inside. So far it has worked great. Nice moneysaver too.


PART 3 - A: THE FURNISHED AND QUITE FULL STUDIO


WELCOME TO THE STUDIO !

It was finally time to move into my new space. It took me a week to get everything inside, again only working part-time. And another week to hook everything up and start fine tuning the place. Finished on Election Day 2008. An omen?
TOP PHOTO
Here is the outbuilding. The two studio rooms are on the right, and the shop is to the far left.
SECOND PHOTO
Enlarge this one: See the shelf I screwed to the top of the interrior window trim and secured with three lengths of chain to the wood wall above it. It's strong, so it can be loaded down with three sets of speakers and lava lights!
This could be a control station when mixing sound. Right now it affords a great view of the musicians and allows air to circulate into the rehearsal space.
THIRD PHOTO
Here are a couple recliners we held onto, knowing we could use them in here one day. The "window" sound absorbers I built are covered with netting, shells, and lights. Above that is another shelf and a large, folding cassette box with a couple hundred cassettes, plus. Great listening position.
BOTTOM PHOTO
Deb reeeaally enjoys the studio!


THE STUDIO: Part Three- B


DECORATIONS
TOP
The top picture is of a small shark being swallowed by progressivly larger sharks' jaws. I'd love to get a 3 foot jaw!
Moral: There's always somebody better than you, so make the best of your speed!
MIDDLE
My son, Michael John -or MJ as most folks call him- made this from an old, special chunk of timber, a porthole window, and a clock. I had to put in a photo of him in Hawaii.
BOTTOM
Debbie had to put a Groucho Marx spin on a toucan carving! Hilarious!


THE STUDIO: Part Three- C


Behind the "wall" of speakers is a ton of storage. If we ever have a yard sale, I'll be able to move the speakers out of this room. A matching red refrigerator sits under the A/C unit.
To the right is the door containing a small, antique glass window; it connects the two rooms.

THE STUDIO: Part Three- D


WELCOME TO THE REHEARSAL ROOM!
Top Photo
Drums, baby! And congas, bongos, sound absorber on wall, a few bells, and the sweetest ashtray you'll ever hear!
Second photo
Rack mount units for recording, miking, effects and amplification. The monitor speakers are the only ones being used in the studio right now. The red refrigerator is in the background.
Third photo
Parrot Ice (Paradice- get it?) neon sign, old mirror, and Hawaiian koa wood ukalele. Under them is the "bar" with its window half open and Debbie on the other side.
Bottom photo
A long view to other end of the room, this shows the two sets of red drapes Deb let me get for the sliding glass door, and the shorter sets she folded up and taped to fit beautifully on the 8 foot window to the left. In the right corner is one of two light boxes on stands that I designed and filled with dimmers and lights after my students built them, back in 2004, the year I retired. These two boxes latch together to form one rectangular metal box that's easy to load in a truck.
In the middle-back is Deb's synthesizer, amp, and headphone mic.
Then the guitar amps, guitars, mic and stand, foot effects.
And in the foreground is the bass player's mic, with the bass amp and speaker cabinet out of the picture.


THE STUDIO: Part Three- E


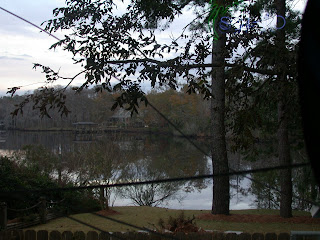
I wrote my first song in over a year and a half just this week, sitting at my old English teaching podium in my new studio.


This is the view out the window while I work. Had to include a sunset shot of the Albin, up on her lift. Thanks for viewing. Please feel free to comment.